| EchoEcho.Com KOMPLETT KURS |
HEM |
EchoEcho.Com REDSKAP & RESURSER |
|||||||||||||||
| |||||||||||||||||
| |||||||||||||||||
|
|
Gˆr fˆljande fˆr att skapa en Shape Tweening. 1. Fˆrst l‰gger du in 41 frames i din movie. Fˆr att gˆra detta klickar du p frame 41 i Layer 1 p timelinen, tryck sedan F5. 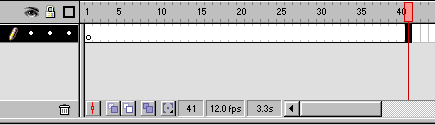 2. L‰gg in en "1" i din movies canvas. Fˆr att gˆra det: v‰lj Text Tool i Toolboxen. Skriv sen "1" med teckenstorlek 48 och fet. Det ‰r viktigt att teckenstorleken inte ‰r fˆr tunn. 3. Nu mÂste du placera "1" precis i mitten p movien. V‰lj den genom att klicka p den med musen. V‰lj Modify > Align i menyn (eller tryck Ctrl + K), en "Align Properties" box kommer att dyka upp. V‰lj inst‰llningarna som visas nedanfˆr. Kom ihÂg att v‰lja "Align to page" mˆjligheten. Klicka OK.  Din "1" ‰r nu placerad i mitten p din movie. 4. N‰sta steg ‰r att "dela sˆnder" tecknet. V‰lj din "1" med musen och tryck Ctrl + B (eller v‰lj Modify > Break Apart i menyn). 5. L‰gg nu in keyframes i frame 19, 40 och 41, Du gˆr det genom att placera frame-pekaren i frame 19 - tryck sen p F6, upprepa sen samma procedur fˆr frame 40 och 41. 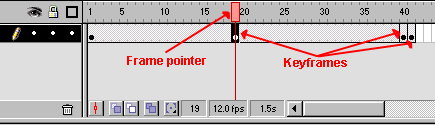 6. Deleta nu "1" i frame 19. Fˆr att gˆra det h‰r: placera frame pekaren i frame 19. V‰lj din "1" och tryck p delete knappen p tangentbordet. 7. N‰sta steg ‰r att l‰gga till en "2" i frame 19. V‰lj Text Tool i Toolboxen och skriv "2" med teckenstorlek 48 och fet. ( "2" kan vara i en annan f‰rg ‰n den du anv‰nde till din "1") 8. Placera nu "2" i mitten p din movie. V‰lj "2" med musen och v‰lj Modify > Align i menyn(eller tryck Ctrl + K), en "Align Properties" box syns nu. (Kom ihÂg att v‰lja "Align to page" mˆjligheten). Klicka OK. Din "2" ‰r nu placerad i mitten av movien. 9. N‰sta steg ‰r att "dela sˆnder" tecknet "2". V‰lj talet med musen och tryck Ctrl + B (Eller v‰lj Modify > Break Apart i menyn). 10. Nu behˆver du l‰gga in en keyframe i frame 21. Det gˆrs genom att placera frame pekaren i frame 21 och sen trycka p F6, (Kolla eventuellt p nr 5 i den h‰r kursen fˆr en illustration). 11. Nu kommer shape tweening. Fˆrst dubbelklickar du p keyframen i frame 1. En "Frame Properties" Box visar sig. V‰lj "Tweening" och v‰lj "Shape" i din "Tweening" drop-down meny. Klicka OK. 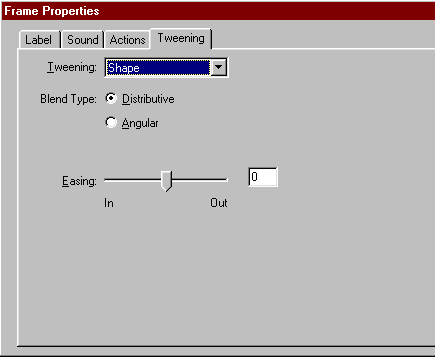 Upprepa det h‰r momentet fˆr att skapa en "shape tweening" i frame 21. 12. N‰sta steg ‰r att l‰gga in shape hints till din movie. Shape hints tillÂter dig att kontrollera din shape tweening. Det h‰r betyder att du v‰ljer vissa punkter p elementet som du vill shape tweena, sen v‰ljer du en motsvarande punkt p elementet d‰r du vill att tweeningen skulle sluta. P det h‰r s‰ttet har du kontroll ˆver vilka punkter p startobjektet som skall bli vad p slutobjektetThis way you are in charge of which points on the start object should become which on the end object. Shape hints contain characters to identify corresponding points on the start and end objects. You can add up to 26 different shape hints in a shape tweening. Position the frame pointer on frame 1. Choose Modify > Transform > Add shape hint in the menu (or press Ctrl + H). Do this twice. Now you have 2 hints in frame 1 and 2 hints in frame 19. Each hint has a letter showing its current position. 13. Now you'd want to position the hints. Starting with the hints on the "1". Position the frame pointer on frame 1. Drag the a hint to the top of your "1". Drag the b hint to the bottom of the "1". 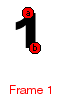 The Hint must be on the edge of the "1". 14. Next position the hints on the "2". Position the frame pointer on frame 19. Move the a hint to the top of the "2". Move the b hint to the bottom of the "2". 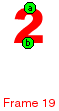 15. Now we will repeat step 12 through 14 to enter shape hints on frame 21 and frame 40. First position the frame pointer on frame 21. Choose Modify > Transform > Add shape hint in the menu (or press Ctrl + H). Do this twice. Now you have 2 hints in frame 12 and 2 hints in frame 40. Each hint has a letter showing its current position. 16. Next repeat step 13 to position shape hints on frame 21 Position the frame pointer on frame 21. Drag the a hint to the top of your "2". Drag the b hint to the bottom of the "2". The hint must be on the edge of the "2". 17. Finally repeat step 14 to position shape hints on frame 40 Position the frame pointer on frame 40. Move the a hint to the top of the "1". Move the b hint to the bottom of the "1". 18. All we need now is to get the movie to loop. You do this by double clicking the keyframe in frame 41. A Frame Properties Box appears. Choose "Actions". Click the button with the plus sign on it. Choose GoTo. Select the "Go to and Play" option. Click OK. 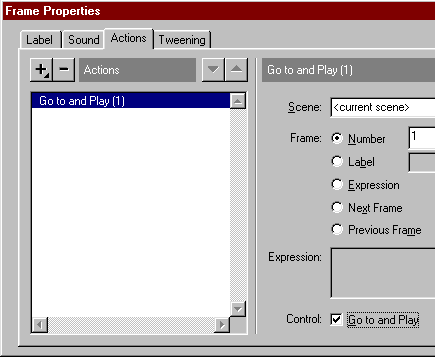 That's all there is to it. You have now created your Shape Tweening. Test the movie by pressing Ctrl + Enter. You can create Shape Tweenings on any element. You just need to remember to break apart the element before doing so.
|
|
|
||||||||||||||||||||||||||||||||||||||||||||||||||||||||||||||||||||||||||||||||||||||||||||||||||||||||||||||||||||||||||||||||||||||||||||||||||||||||||||||||||
|
|
| EchoEcho.Com KOMPLETT KURS |
|
EchoEcho.Com REDSKAP & RESURSER |
|||||||||||||||||
(c) Copyright 1998-2000 NetKontoret - All Rights ReservedÝÝÝÝÝÝÝÝ | |||||||||||||||||||