
| 
| 
|
 First look at this example of a Motion Guide Tweening:
Do the following to make a Motion Guide Tweening.
1.
To insert 30 frames in your movie with the mouse:
Click frame 30 in layer 1 on the timeline - then press F5.

2.
Now you need to find the element you want to tween.
( It can be any element you like ) .
Choose Libraries > Graphics in the menu.
Library - Grapics opens.
Find Bird and with the mouse, drag it into the canvas.
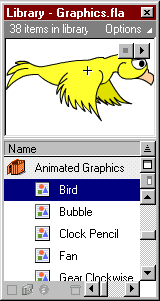
Use the scale tool in the toolbox, to resize the bird as you like.
(If your version of Flash does not contain "bird", then just use any other symbol).
3.
Now enter a keyframe in frame 30. To do this, first click
frame 30 in layer one on the timeline. Then press F6.

4.
Next, double click the keyframe in frame 1.
A frame Properties Box pops up.
Choose "Tweening", and in the Tweening drop-down menu choose "Motion".
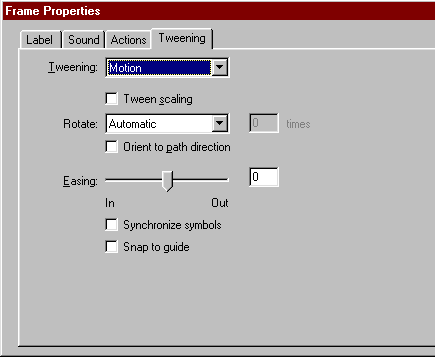
Click OK
5.
Right click on Layer 1.
A pop-up menu appears.
Choose Add Motion Guide.
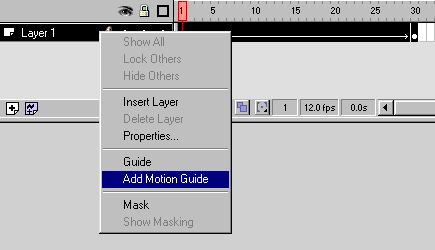
Flash now inserts a new layer on top of layer 1,
with the Motion Guide icon to the left of the layer's name.

This new layer is called a motion guide layer.
Motion guide layers are used to draw lines that you want an animated symbol to follow.
6.
Click on the Motion Guide Layer to make sure it is the active layer.
(Click on the layer name, where it says "Guide: Layer 1").
Choose pencil  in the toolbox. (Or press P on the keyboard) in the toolbox. (Or press P on the keyboard)
Make sure pencil mode is set to "Smooth".
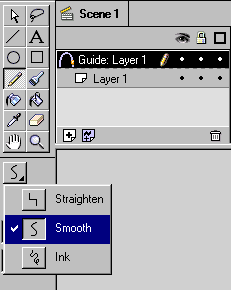
With the pencil draw the line you want the bird to fly along.
For example like this:

(Hint: Do not make complex patterns until you're familiar with the technique).
7.
Now adjust the frame pointer so it points to frame 1.

Make sure the Snap button  is activated (or choose is activated (or choose
View > Snap in the menu, to activate snapping).
8.
With the mouse, place the bird so that its center is at the beginning of your motion guide.
(The center is indicated by a small + when selected).
A black circle appears when the bird is attached to the motion guide.
It can sometimes be hard to get the symbol to snap to the guide. Eventually it will though :o)
Try zooming in or out if you just can't get the bird to snap to the guide.
Release the mouse button when the bird is snapped to the guide.
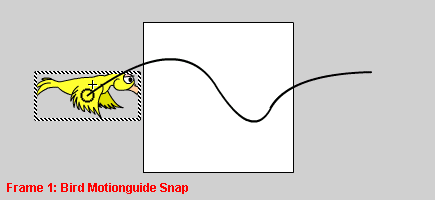
Now adjust the frame pointer so that it points at frame 30. Repeat the process
placing the bird at the end of the motion guide.
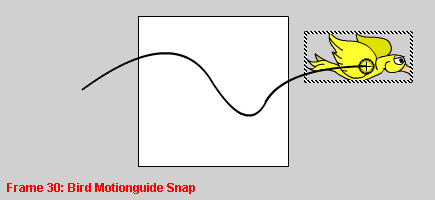
Congrats! You have just created .... (drumrolls)...... a Motion Guide Tweening!
The bird will now follow the motion guide when you play the movie.
Press Ctrl+Enter to test your movie.
Orient to path direction.
If say, your motion guide was a circle, you would have the bird fly in a thrilling loop.
However it would look kind of odd, since the bird would only follow the circle, but not
actually point the nose in the direction of the circle.
During the entire loop the bird would have its head pointing to the right :o)
Eventually the bird would fly backwards. Quite a thrill maybe... but .. not too realistic :o)
If you want the bird to actually follow the circle, not only in movement, but also in direction,
you should double click the keyframe in frame 1 on layer 1.
This will reopen the frame properties box.
Choose the "tweening" option.
Select the "Orient to path direction" option, and click ok.

|
|

|

|